


This guide explains how to remove an existing hard drive (HDD), install a new or replacement hard drive, and format the HDD in an X Series – Lorex Connect XC 4K 8-Channel NVR.
Applicable models:
- RNE01P-82B-AB1: Model with a pre-installed HDD.
- RNE01P-8ZB-AB1: Model without a pre-installed HDD.
TABLE OF CONTENTS
- Before You Begin
- Step 1: Remove the Existing Hard Drive
- Step 2: Install the New Hard Drive
- Step 3: Format the Hard Drive
- Step 4: Check the Hard Drive Status and Recording Overwrite
- Helpful Tips
Before You Begin
The 8-Channel X Series NVR supports one internal 3.5-inch SATA hard drive, up to 12 TB. Choose a compatible surveillance-grade HDD designed for continuous recording. This model has one HDD bay, unlike the 16- and 32-channel NVRs.
What you will need:
- One compatible surveillance-grade 3.5-inch SATA HDD (12 TB maximum).
- A Phillips screwdriver for the recorder's cover and HDD mounting screws.
- The proper HDD mounting screws. The 8-channel NVR package includes HDD screws; retain screws from an existing drive when replacing it.
- A monitor and USB mouse to access the recorder's Disk menu after installation.
Step 1: Remove the Existing Hard Drive
Follow these instructions only if a drive is already installed and you are replacing or removing it. If the recorder has an empty drive bay, skip to Step 2.
- Power off and disconnect the recorder. Shut down the NVR, unplug the power adapter from the power source, and disconnect the other cables. Place the NVR on a stable, flat work surface.
-
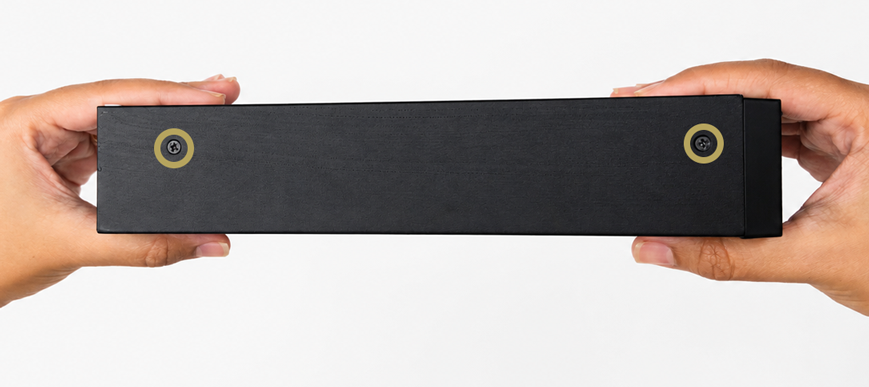
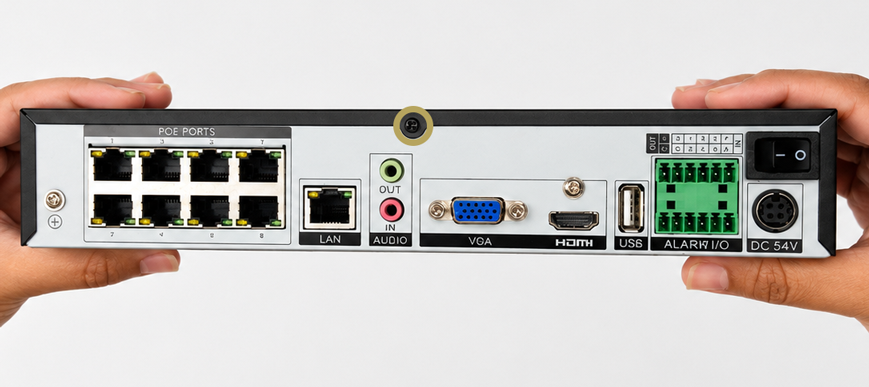
Remove the top-cover screws. Use a Phillips screwdriver to remove four side screws (two on each side) and one rear screw. Keep them in a safe place for reassembly.
-
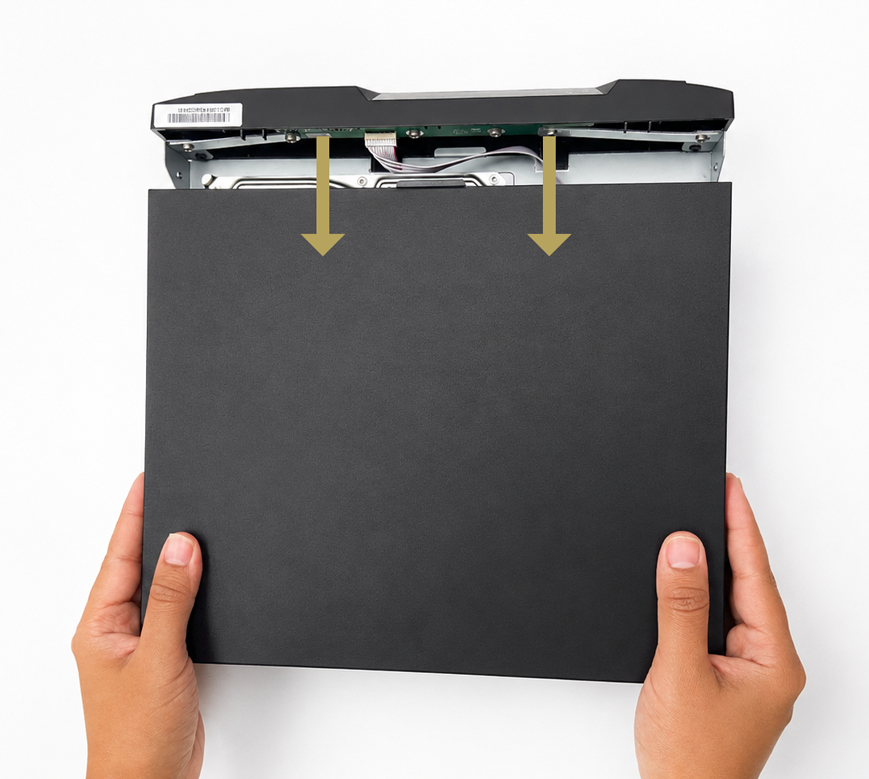
Open the NVR case. Slide the top cover away from the NVR, then carefully lift it off to expose the HDD.
-
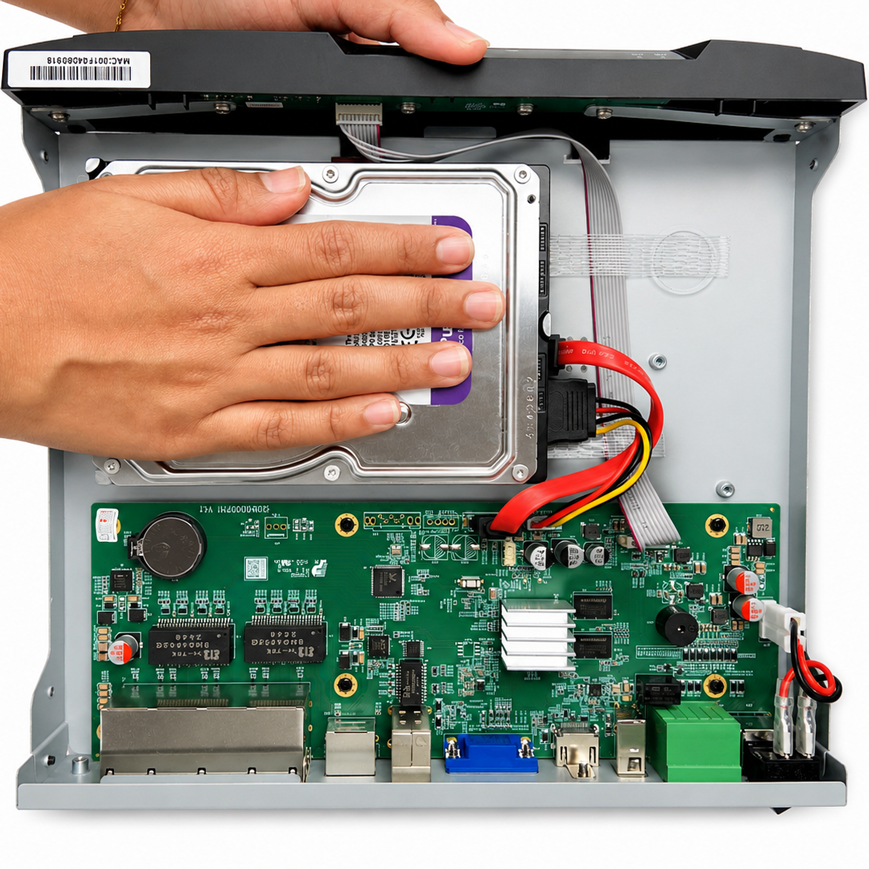
Support the HDD and turn the NVR over. Hold the installed drive securely in place with one hand while carefully flipping the NVR to access the bottom panel.
-
Remove the four HDD mounting screws. With the bottom panel accessible, remove the four screws securing the HDD to the chassis. Continue supporting the HDD to prevent it from shifting.
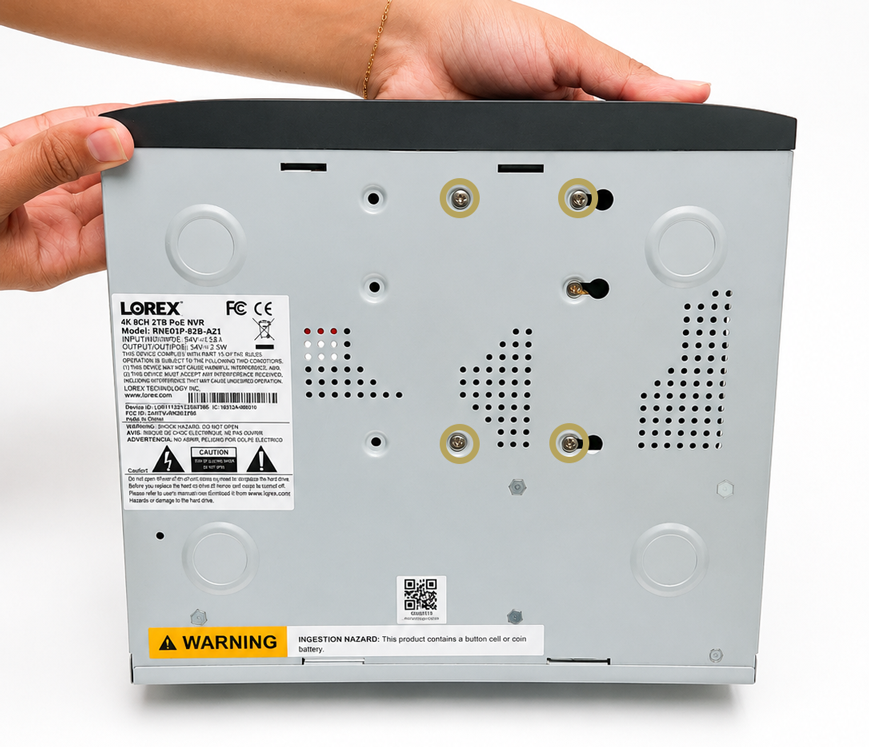
-
Turn the NVR upright. Keep a hand on the loosened HDD, carefully turn the NVR upright again, and slide the HDD partway out to expose its connectors.
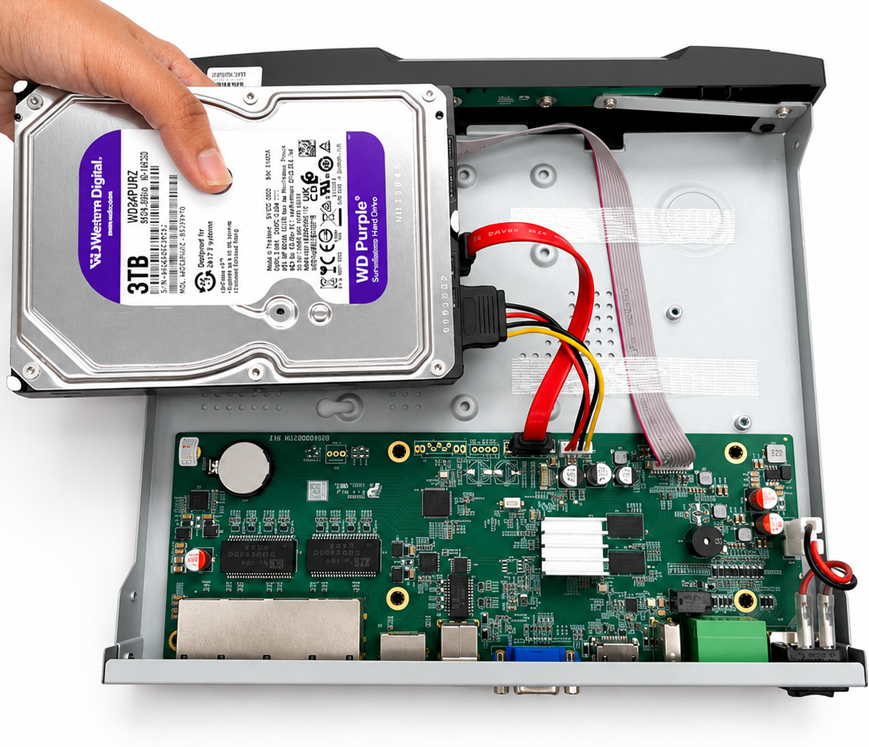
-
Disconnect the HDD cables. Gently unplug both the SATA data cable and the HDD power cable by pulling the connectors straight out rather than tugging the wires.
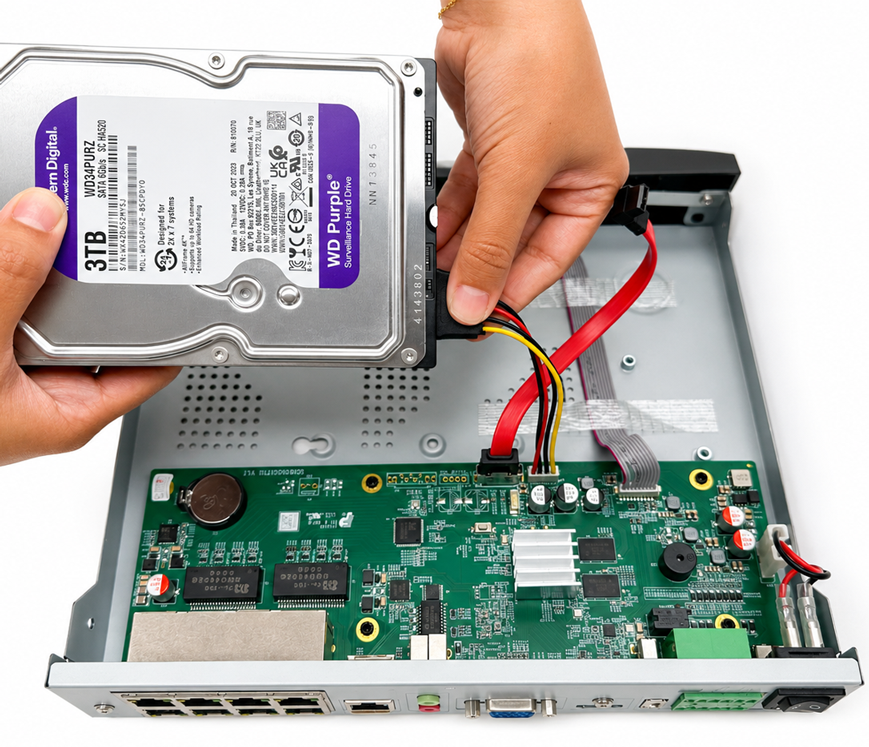
- Remove the existing HDD. Carefully remove the drive from the NVR. The empty bay is now ready for a replacement.
Continue to Step 2: Install the New Hard Drive.
Step 2: Install the New Hard Drive
Follow these steps to install a new HDD or replace an existing drive. If your RNE01P-8ZB-AB1 was sold without a drive, begin here after opening the powered-off, disconnected recorder using the cover-removal instructions in Step 1.
- Prepare the new hard drive. Confirm that it is a compatible 3.5-inch SATA HDD with a capacity of 12 TB or less.
-
Insert the HDD. Slide the new drive into the NVR's single HDD bay and hold it securely with one hand.
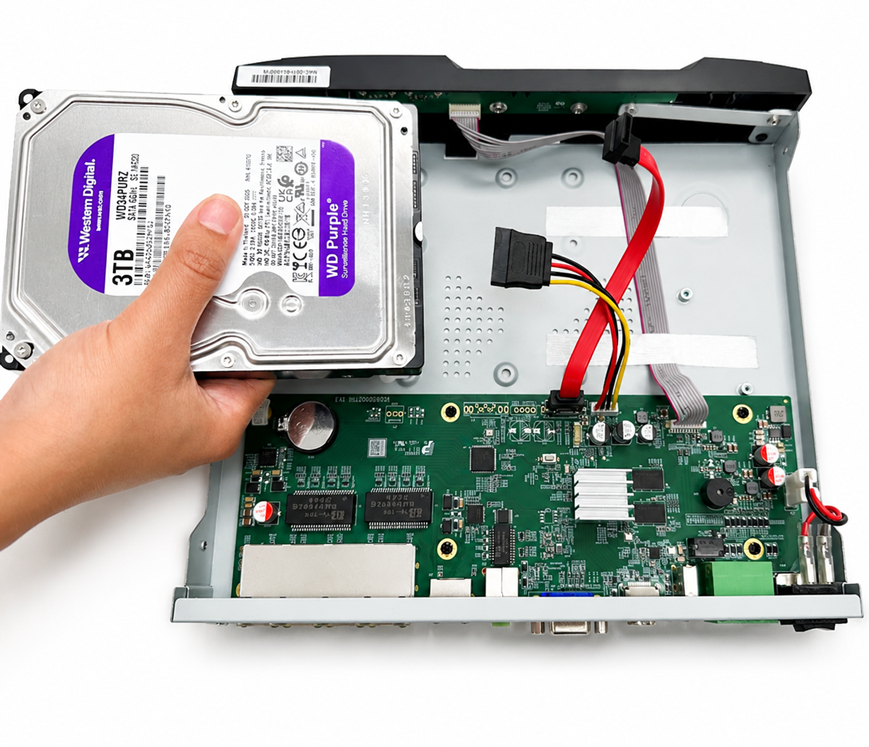
-
Connect the drive cables. Plug the NVR's SATA data cable and HDD power cable into the corresponding connectors on the new drive. Make sure the connectors are fully seated.
-
Turn the NVR over while supporting the HDD. Carefully flip the recorder to expose its bottom panel. Keep the HDD in place with one hand.
- Align the drive mounting holes. Match the screw holes on the bottom of the drive with the corresponding holes on the bottom of the NVR chassis.
-
Secure the HDD. Use a Phillips screwdriver to install and tighten the four HDD mounting screws through the bottom panel.
-
Turn the NVR upright and replace its cover. Carefully flip the unit upright, slide the top cover back into place, and reinstall the cover screws in their original positions.
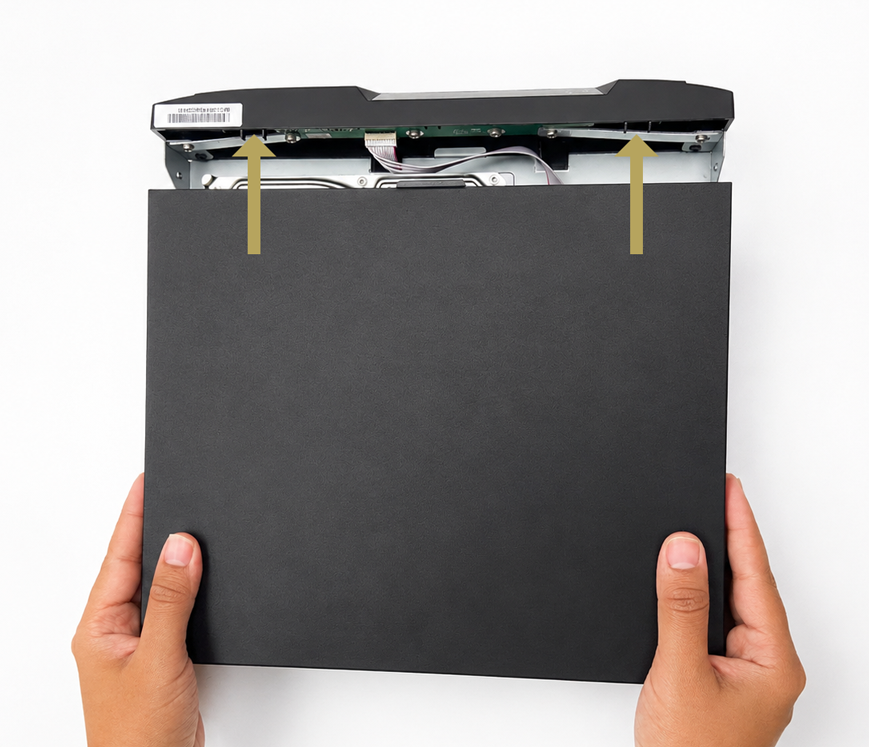
- Reconnect and power on the recorder. Reconnect the monitor, mouse, network and camera cables as needed. Reconnect the power adapter, then turn on the NVR.
- Format the installed HDD. The new drive must be formatted before the recorder can use it for local recording. Continue to Step 3: Format the Hard Drive.
Step 3: Format the Hard Drive
Formatting prepares the newly installed HDD to store local recordings on the X Series NVR.
- From Live View, right-click twice to open the Main Menu.
- Click Settings.
- Select the Record tab at the top of the menu.
- Click Disk from the left-side menu.
- Select the Disk tab.
- Select the installed HDD, if it is not already selected.
- Click Format and confirm the formatting prompt.
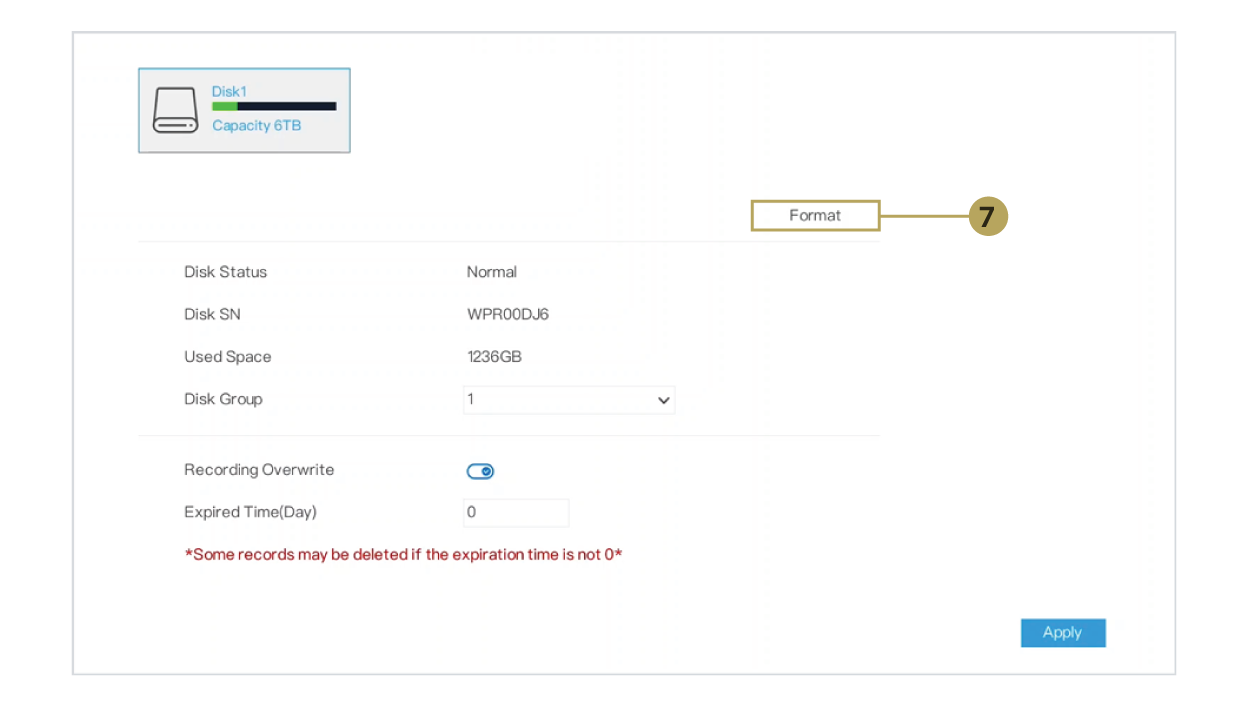
After formatting finishes, check the hard drive status in the next section.
Step 4: Check the Hard Drive Status and Recording Overwrite
In the same Settings > Record > Disk > Disk menu, confirm the new drive is recognized and review its recording settings.
- Locate the installed drive in the Disk list.
- Check Disk Status. During normal operation, it should display Normal.
- Review the available details, including the drive's Disk SN and Used Space.
- If applicable, review the Disk Group assignment.
- Enable Recording Overwrite if you want the NVR to automatically replace the oldest recordings when the HDD becomes full. If overwrite is disabled, recording stops once the drive is full.
- If needed, configure Expired Time (Day) to control recording retention.
- Click Apply to save any changes.
Helpful Tips
- No HDD included? For RNE01P-8ZB-AB1, begin with Step 2: Install the New Hard Drive. First follow the cover-opening instructions in Step 1, but skip removing an existing drive.
- HDD capacity: Use a compatible 3.5-inch SATA drive, up to 12 TB.
- Drive not listed? Power off and unplug the recorder before checking that the SATA data and power cables are connected securely.
- Drive not recording? Confirm the disk has been formatted and shows Normal status. Review the recorder's recording schedule.
- Continuous recording storage: Enable Recording Overwrite if you want the NVR to continue saving video when the disk fills.
- More details: See Chapter 11 – Recording & Storage, especially Sections 11.2.1–11.2.3, of the X Series XC 8-Channel NVR User Manual (SKU: RNE01P-8).