U424AA Series - 2K Wire-Free Camera: Installation Guide
Installation Guides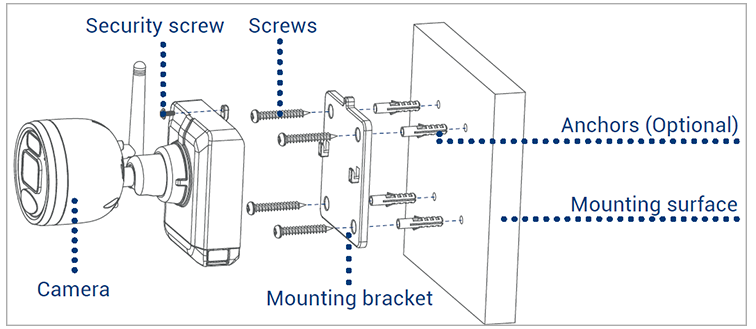
-
Set the mounting bracket in the desired mounting position.
-
Mark holes through the mounting bracket.
-
Using the included drill bit, drill holes where marked.
-
Using the included screwdriver, secure the bracket with the provided mounting screws. Optional: If you are mounting the camera into drywall, use the provided drywall anchors.
-
Align the cameraÂ’s mounting plate slots to the tabs in the mounting bracket. Push in and slide down to secure in place.
-
Insert the security screw through the fasteners on the top of the camera and mounting bracket, then tighten with the screwdriver.
-
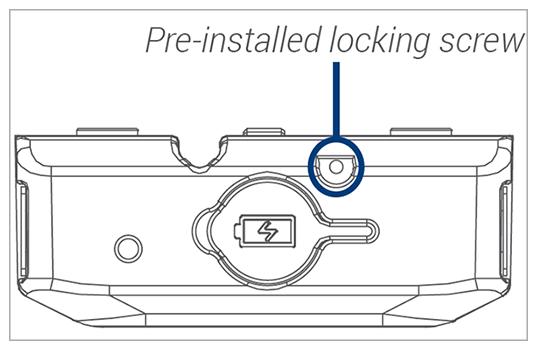
Tighten the pre-installed locking screw using the screwdriver. Note: To remove the power pack in the future, loosen the locking screw.
-
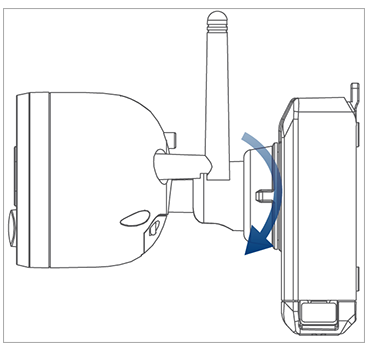
Adjust the camera to the desired position. Tighten the adjustment ring clockwise.